Category Archives: Make this house a home

OMG Renovations and organization.

Currently our house is under renovations.

We have the downstairs pretty much done but upstairs is a bit lack luster.

Our to-do list is as follows

  1. Paint baseboards
  2. Put up baseboards
  3. Put up light fixtures
  4. Make the powder room functional
  5. Organize office, baby room, master bedroom
  6. Move EVERYTHING up stairs.
  7. Take a 16 day nap.

Our Budget is quite small. I’m hesitant to give a exact number so let’s just say it’s about half the normal. To save a few $clams we’ll be doing a thing or two on our own. Most of the house had a very 90’s motif to it… like EVERYWHERE!!! Think Light pink, light dusty blue, gold and flowers everywhere! no joke. The house its self is really cool, the add-on that was done recently is very nice but the rest was definitely far from ideal.

I’ll post some before and afters when I get my hands on them. Promise.

Starting in the bathroom I’ll be painting the bathtub with enamel paint. Apparently you can purchase kits from Home Builders that allow you to re-finish tubs. Currently our tub is a large jacuzzi that could fit about two people. Its very nice BUT IT’S PINK *barf.

If you’re into pink that’s cool. I however do not imagine my dream bath in pink. The counters are fiberglass do they too will get a coat of paint, as well as the pink flower tiles. The toilet has to be changed and the stand alone shower. (the shower may have to come next year).

IMG_1326

bathroom

In the master, baby room, office and halls we already put in hardwood flooring. The Hardwood is a light oak. The guy who did these floors did a super good job. Before they were very uneven.

Image

Oak-ish

In the master we painted the walls a light sandy brown, here I’m thinking country oasis, shabby-chic with a big glass closet and drawers. A place for us to retire to when we need to get away. Keep in mind that, A) this room is actually bigger than it looks in this photo B) these rooms are messy because they’re under renovation.

IMG_1325

master bedroom

In the baby-room we painted the walls a dark teal blue color. I love this color and I’m excited that it worked out so well. It actually makes the room look taller and brighter. In this room I’m imagining a sort of Star trek-meets-dinosaurs-meets-60’s mod-meets-man cave. Very cool. When baby gets older he will move downstairs and we’ll take over this room. I have no idea what we’ll do with the space. Classy library perhaps?

Nursery

IMG_1331

nursery

We left the office white and will be putting up art and family pictures. I think it should stay kinda chill with no distractions for when DH is working.

IMG_1335

office

So as the action happens I’ll keep you updated!

I’m always looking for inspiration so let me know what you think I should add!

Tagged , , , , , , , , , , , , , , , , , ,

Pinterest Pass! Glue Balloons. Results.

Its crazy! I thought that for sure this one would be a epic fail!

You judge for your self.

I was supposed to get something like this…

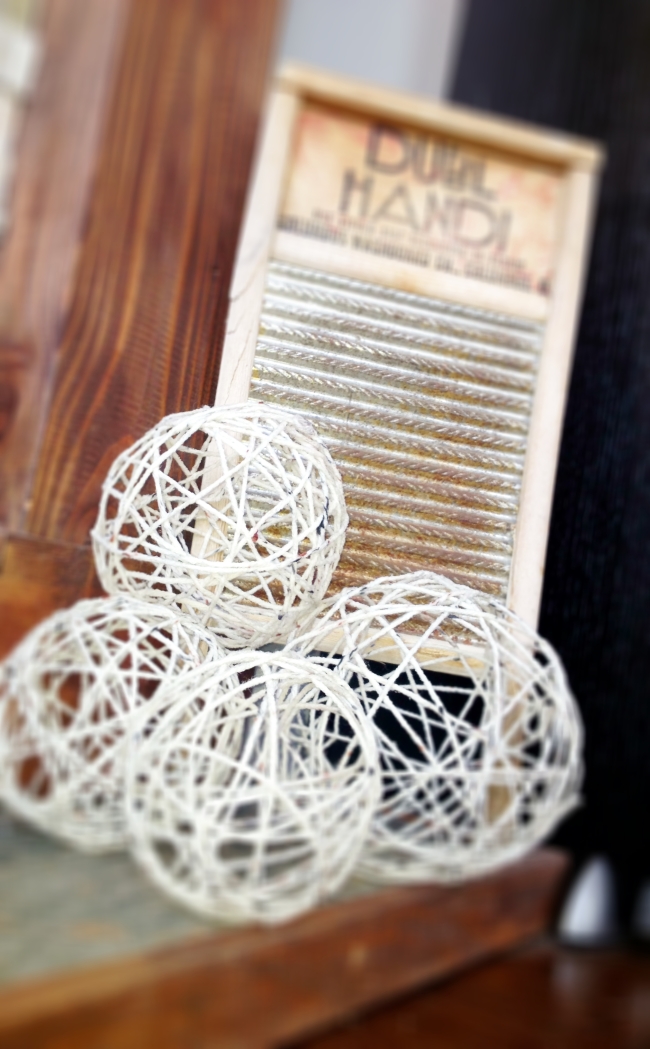
Brilliant Idea: Dip yarn in watered down glue, wrap around balloon and pop balloon when dry.

What I got was this…

Image

I like mine because they look a bit more organic, almost like a sparrows nest.

The steps went as follows.

  1. Dip yarn in clear drying glue.
  2. Wrap gluey yarn around blown up balloons.
  3. Wait for it to dry.
  4. Pop balloon, remove balloon bits.
  5. Enjoy how artsy you are.

I loved this challenge, I liked getting messy and the surprise of it actually looking cool.
I think that this would be fun to do with a older toddler. Non-toxic glue is a MUST. The string took a really really long time to dry. If the sting isn’t 100% dry the structure will fall apart.

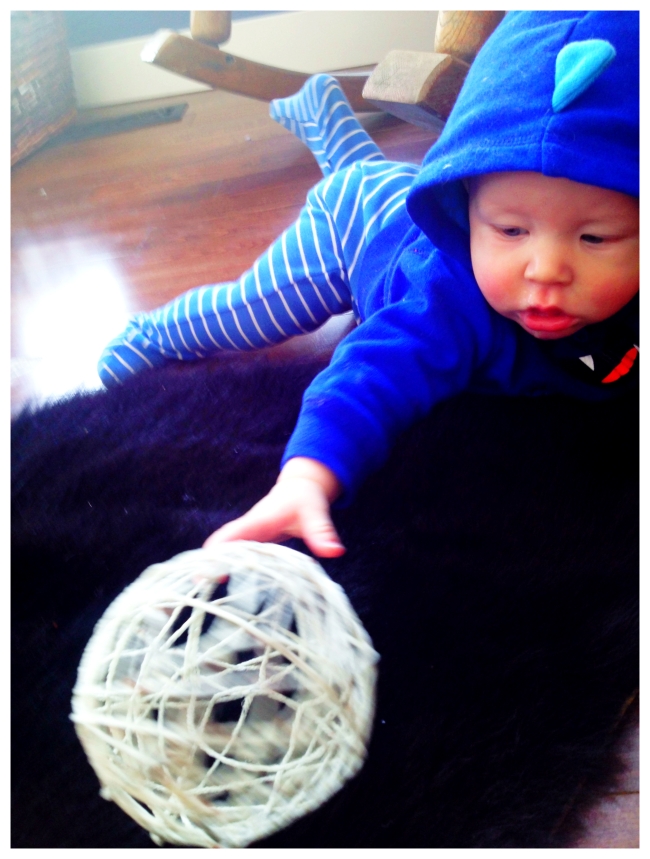
My son loved playing with this one…

Image

Cute! Needless to say that one got super crushed. Don’t worry I was watching him the whole time. No babies were hurt in the making of this post.

So For the Glue Balloons,

My verdict: PASS!!

I say if you have the time and want to make some nifty looking things try this one out!

Tomorrow I will be making a letter in a frame thingy.

kisses!

Tagged , , , , , , , , , , , , , , , , , , , , , , , ,

Pinterest Fail, Day 1

Oh… My… God… yikes.

For those of you that are new to the (s)lacking housewife here is the post explaining my experiment

So today when I woke up I had high hopes that this would be a super fun craft. I was wrong!

Not only did it take forever, but, I had molten liquid crayon burning my hands and getting all over my floor.

This is what it was supposed to look like,

Canvas.

I wouldn’t say that it ended up so nice.

Here are the steps that I was to follow. People made them look to easy,

Step 1, glue crayons to canvas with hot glue.

Step 2, tape interesting design on to canvas

Step 3, melt crayons down the canvas with blow dryer

Step 4, pull off tape.

Step 5, MARVEL AT YOUR OWN GENIUS!

For me the steps where going fine until it came to actually melting the Crayons.
The hot glue didn’t stick so the crayons would fall off of the canvas. Eventually I just glued them to a piece of cardboard. Even then they still fell off. The crayon would also pile up in one spot or fly off of the canvas all together.

This was lame!

This was lame!

So after two hours of battling and burning I got this…

Fail

Fail

yeah,

I am not hanging that on my wall.

I feel that in you have a lot of time, practice and patience you could maybe make this look cool also, this is not a project I would do with a child. The Lava Crayon would burn their skin.

My verdict: PINTEREST FAIL!!

So now I’m going to wash the crayon out of my hair and off of my face and prepare for tomorrows super happy fun time project.

It is just me or should this have turned out better? Have you done this project? if so how did it turn out? let me know!

Tomorrow, Balls With Paper Pinned to them.

Tagged , , , , , , , , , , , , , , , , , ,

Sweet hearts for a sweet heart

A quick little post before the weekend.

Our family friends have the cutest little girl and this weekend is her birthday party. Because I think she is just the sweetest of all sweet hearts. I made her some sugar cookies, while watching Enter the Dragon with Bruce Lee. Such a good movie, I’m a nerd for kung fu. Don’t get me stared on
Legend Of The Drunken Master

But I digress,

The cookies have pink and purple royal icing with party sprinkles. You just can’t have a party without party sprinkles!. It took me 4 hours to finish (but I did take a nap).  I think these are super classic and somehow I didn’t ruin them all. However I did have to eat about 10 broken or defective cookies and of course check for poison. (I say that whenever I steal a bite of food, “don’t worry I’m checking your food for poison!”)

I tried doing the piping bag icing style but I made a mess, so in the end I used a bakers brush. Which is just a clean unused paint brush. I brush on the icing like I’m painting a oil canvas. Thick but no too think.

I’m pretty happy with the results.

IMG_1231

royal icing recipe

sugar cookie recipe

I suck at a whole buncha things, but damn am I good at taking naps!

Have a good weekend friends! And make sure to check in on my Pinterest experiment on Monday!

PEACE OUT!

Tagged , , , , , , , , , , , , , , , , , , , , , , , , , ,

RuPauls Moosewood Cookbook.

 I’ve been binge watching RuPaul’s Drag Race. Which is nearly the worst/best show ever. While watching queens scratch, swear, fight and be sickeningly fierce I’ve been flipping through my Moosewood Cookbook.

moosewoodrupaul

Not only are Ru’s ladies Fab-u-lous but so is this cookbook. All Vegetarian hardy food. If you get a chance check this cookbook out. Its my go to for yummy meals. Tonight I will be making the Hummus. yum yum.

On another note, last week I promised a Pinterest challenge. I am planning on doing this experiment next week starting on Monday.

My schedule is as follows

Monday, Melted Crayon Art.

Canvas.

Tuesday, Balls with paper pinned to them

I'm on a big tissue paper balls & flowers kick lately.

Wednesday, 3D Stars

3D paper stars

Thursday, Glue Balloons.

Brilliant Idea: Dip yarn in watered down glue, wrap around balloon and pop balloon when dry.

Friday, Something like whatever this is.

Fabric or scrapbook paper for a background with a painted initial in an open frame. Too cute!

So that’ll be fun! yeehaw!

IF YOU WANT TO SEE ME FUDGE SOMETHING UP LET ME KNOW!

sorry caps lock was on

Kisses!

Tagged , , , , , , , , , , , , , ,

how Pinterest is RUINING MY LIFE!

My brain is just-a-racing when it comes to this subject.

I am a Pinterest junky, like I imagine a lot of people are and I really like the D.I.Y. section, I mean.. really really like! I am constantly pinning and checking out these amazing D.I.Y. projects. but…

HOW COME MY PROJECTS ALWAYS FAIL?!

I can put together the most intricate Ikea furniture, I can follow ridiculous sewing patterns, I can follow any recipe in a gosh darn cookbook. Heck I’m even okay at following road directions to the store. But Pinterest D.I.Y. projects kick me in the bum. For reals.

I imagine that all good housewives are good at D.I.Y. So my next subject is…

Step #2. Be good at Pinterest junk because other housewives are and I wanna make pretty things too!

My plan is to show you what I’m supposed to make, make it, then show you my results. I’m hoping that a bit of practice will help me master this all important housewife tool. I’m thinking I’ll do 5 D.I.Y. pins altogether. One project everyday for a week.

Please suggest projects that you’d like me to tackle.

If I do good then I will become the…

.diy-queen-web

OF THE WORLD! 

or just in my mind. whatever.

Tagged , , , , , , , , , ,

Step #1. Clean the house, keep it clean. Update!

Here is a update on my current house situation.

I managed to get the whole place cleaned right up!

I’m actually really proud of my home right now. Its spotless! Not a first but still pretty rare. Here are some of my after photos and some tips I like to use

(I hope you remember what my before pics look like if not… take a look)

Let us start on my kitchen.

IMG_1151

I like the sunshine in this photo.

 We have all granite counters in our kitchen. Very pretty to look at but kinda a drag to keep clean and streak free. I find that using regular Windex will not give these bad boys what they need to keep spiffy. I wanna see my refection! Here to save the day is my fave product…

rub on, rub off.

Wax on, Wax off. Mr. Miyagi would be proud.

This stuff is amazing! Use it like any other waxing product. It will leave your counters shiny and it smells great. Did I mention that its all natural?! Just blew my mind!

I also have a glass top stove and it likes to get crud caked on it. The following is a something from Pinterest that I actually did NOT funk-up.

Damp towels over cleaning product. let sit for a while.

Damp towels over cleaning product. let sit for a while. then wipe off. very cool!

The result is…

hey you can see me in the reflection on the microwave.

shiny! hey you can see my in the reflection on the microwave.

Now for the bathroom. I cleaned up with basic elbow grease and determination. One thing that did help was those Mr. Clean magic erasers!

IMG_1195

nice and sea foam green.

Last but not least, our living room. We have hardwood floors and they happen to be a darker color. They also like to show streaks (not those kinds of streaks… gross). The easiest thing for me to do is Swiffer, then run a dry shammy over them while they’re still wet. Thus drying them and thus creating a no-streak floor!

IMG_1192

sans streaks

As you can see my home looks pretty good. I will keep you updated on the cleaning list and how it works for me. I really haven’t had the chance to use it to its fullest. First I had to get this place lookin’ good.

Heck yeah! Step #1 is complete!

What should step #2 Be?

Leave a comment and let me know what you think it should be.

Tagged , , , , , , , , , , ,

Step 1. clean the house. keep it clean.


Sigh* this one is a hard one for me to do.

Like some Bachelor/Bachelorettes I have a major problem with keeping a clean home.

 So the following is a one week housecleaning make-over. I feel like this is a good starting point for my blog seeing as this is all about my road to Great Domestic Engineering.

Where to start?

 Well what do you do when you have a major problem? You Google it! And that is how I came across this wonderful site put up by a (almost perfect) mom. http://mylifeandkids.com/my-daily-cleaning-schedule/. As you can see she has created a daily cleaning list. Following her lead I have done the same.

The following is what I have created for myself.

.IMG_1121

 Wondering why Wednesday is missing? Because I can never remember how to spell it. Thank god for spell check. As you can see I have put a few little chores on for every weekday. I wanted to leave the weekend free so that I can spend it with my husband and child. Every day of the week is loosely dedicated to a room in the house. I tried to keep the daily chores time under 2 hours. Anymore time then that is just impossible. Bellow is my before pictures. I took my pictures in panoramic so that you can grasp the full spectrum of the mess I’m dealing with. I omitted the upstairs and backroom because I have a renter in my back apartment and my upstairs in under construction.

My plan to to follow these lists and update you on my progress.

If you promise not to judge me you can look at my before pictures. I know its messy…. —>—>

The Bathroom

IMG_1126

The Kitchen

Kitchen

The Living Room

Front room

The More of the Living Room

IMG_1131

 To be fair when I took these pictures my child was sick AND teething, my husband was opening a new bar as well as working a full time job, renovations going on upstairs in the master bedroom, babyroom, office and master bathroom (more on renovations in a later blog).

So wish me luck!

Next time on The Lost House wife…

RESULTS

Tagged , , , , , , , , , , , ,